

How To Draw A Flat Hand Sideways
Everyone who's passionate about drawing or arts in general knows that being able to depict a manus is essential, especially if you're planning on drawing portraits in the future.
Thus, how to draw a hand is one of the most highly-requested tutorials on our website. At present, you lot've asked for it, and we delivered. All you need is a pen and newspaper and you're all set to beginning cartoon!
Fortunately, nosotros accept curated a footstep-by-footstep tutorial on how to describe a hand summarized in 9 piece of cake and simple steps.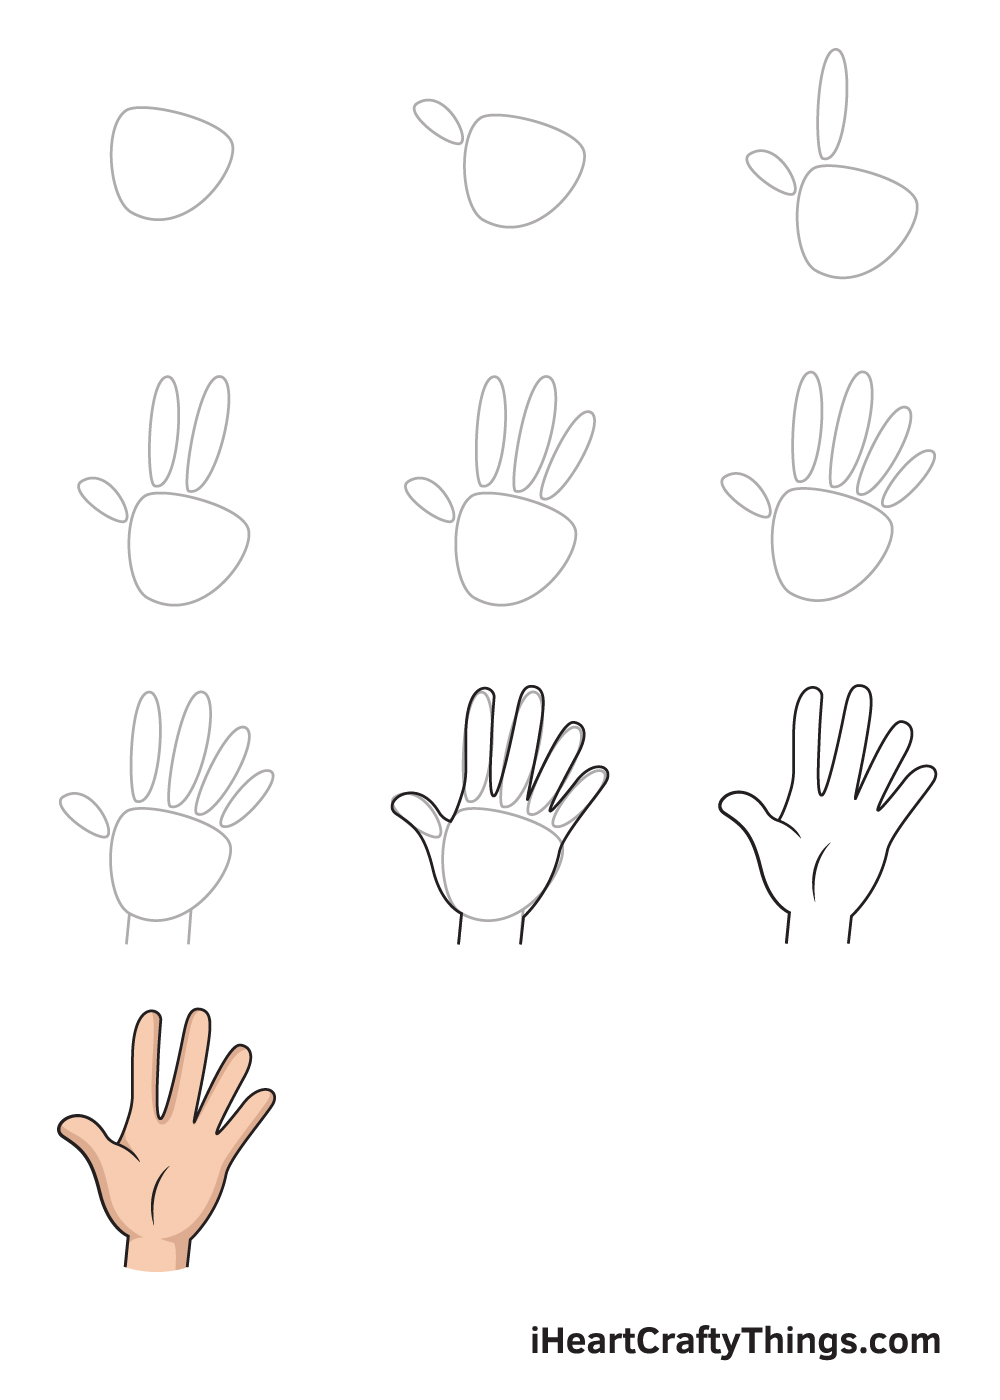
You tin can apply these steps whether you want to draw a realistic-looking hand or an animated one.
Each stride is accompanied with comprehensible illustrations that serve equally your visual guide as you lot follow the instructions.
Whether yous are a novice or an practiced in drawing, we're sure you can follow these steps effortlessly. What'southward more, you lot tin add your ain mode and improvise in every step.
Feel free to mix and match colors to customize your artwork and make it unique. Let your imagination wander and unleash your creativity. Take fun and employ your artistic skills!
What'south in this Web log Mail
- How to Draw a Mitt — Permit'south become started!
- Step 1
- Step 2 — Draw the Outline of the Thumb
- Step 3 — Then, Draw the Outline of the Index Finger
- Step iv — Adjacent, Draw the Outline of the Middle Finger
- Step 5 — Subsequently, Draw the Outline of the Ring Finger
- Footstep half-dozen — Next, Depict the Outline of the Pinky Finger
- Footstep 7 — Now, Describe the Wrists Below the Hand
- Step viii — Trace and Structure the Outline
- Stride 9 — Erase the Outline Add Palm Lines
- Your Hand Drawing is Complete!
How to Draw a Hand — Let's get started!
Footstep one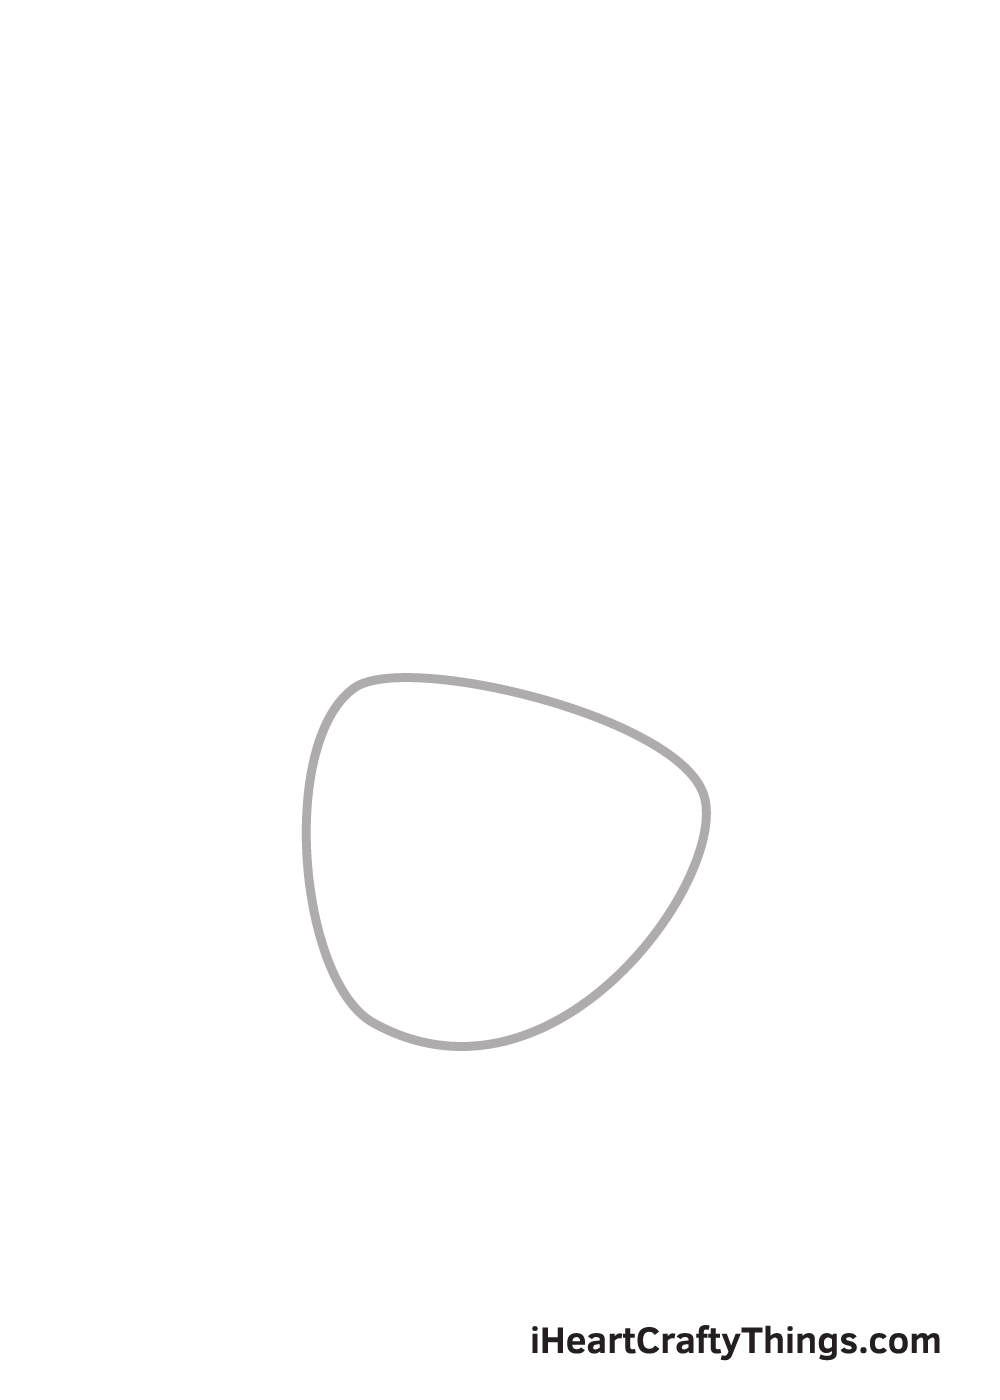
In this tutorial, we will be drawing the open up palm of a left hand. Starting at the middle lesser of your paper, describe the outline of the palm. Information technology's as piece of cake as 1-two-3: simply draw a tilted irregular circle shape with a flat wide top and narrow curved bottom, as shown in the analogy.
To ensure that the outline will be positioned in the centre correctly, draw a horizontal and a vertical line across the newspaper to create reference lines. Make sure that you depict the outline of the palm on the bottom vertical line.
Starting at the bottom of your newspaper provides sufficient infinite for you to draw the fingers.
Stride ii — Draw the Outline of the Thumb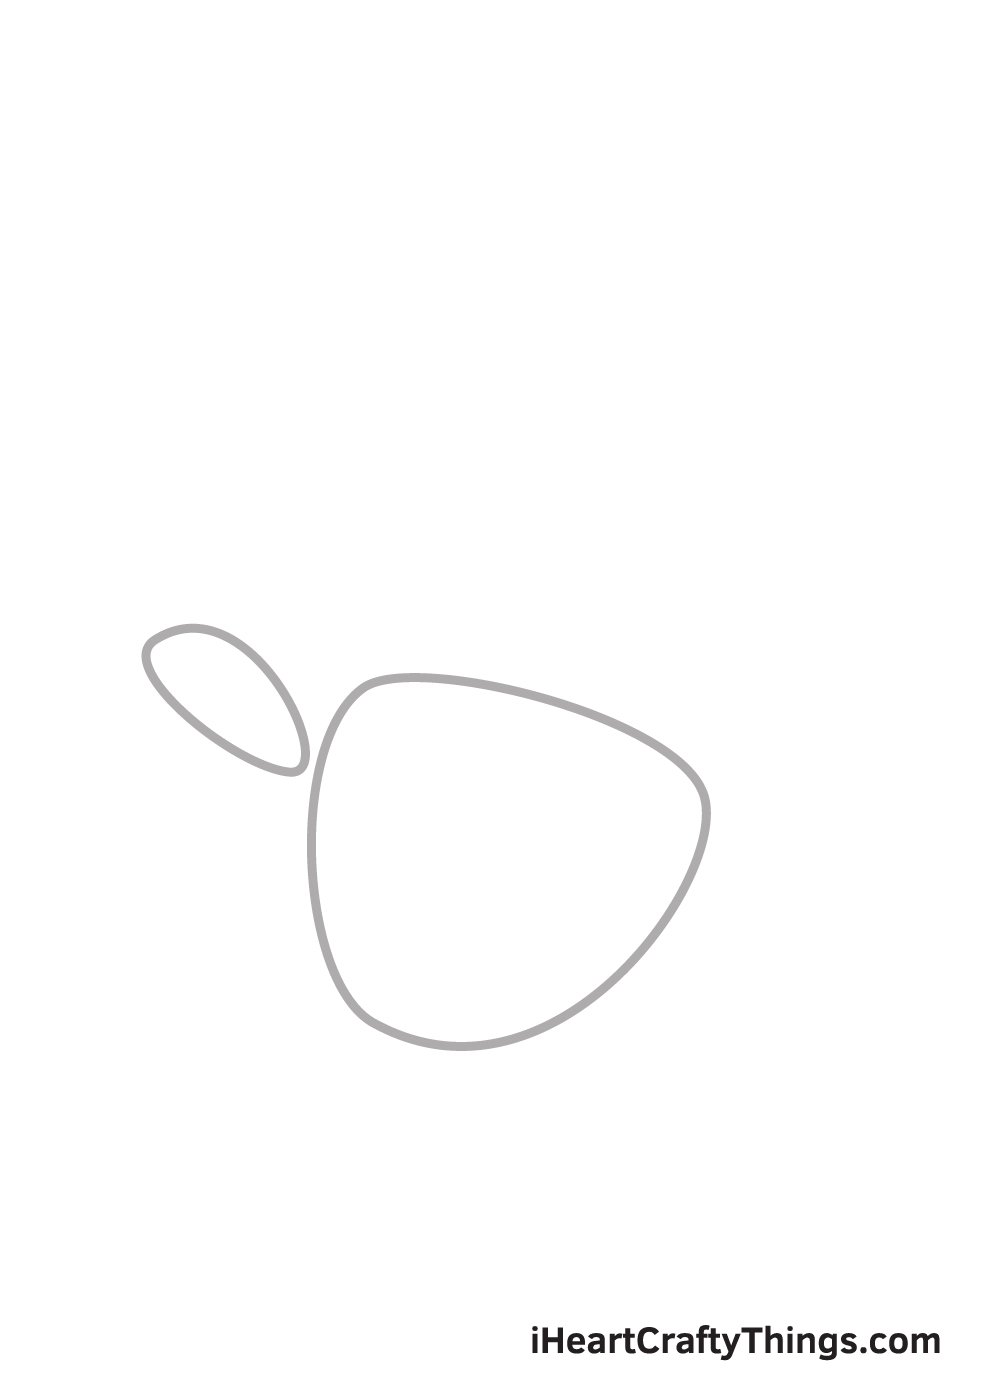
On the left side of the palm, describe an oval shape to outline the thumb.
Bear in listen that the outlines should exist slightly autonomously from each other and not overlapping. We will be able to connect all of them one time we become over and trace the outlines.
Step three — Then, Describe the Outline of the Index Finger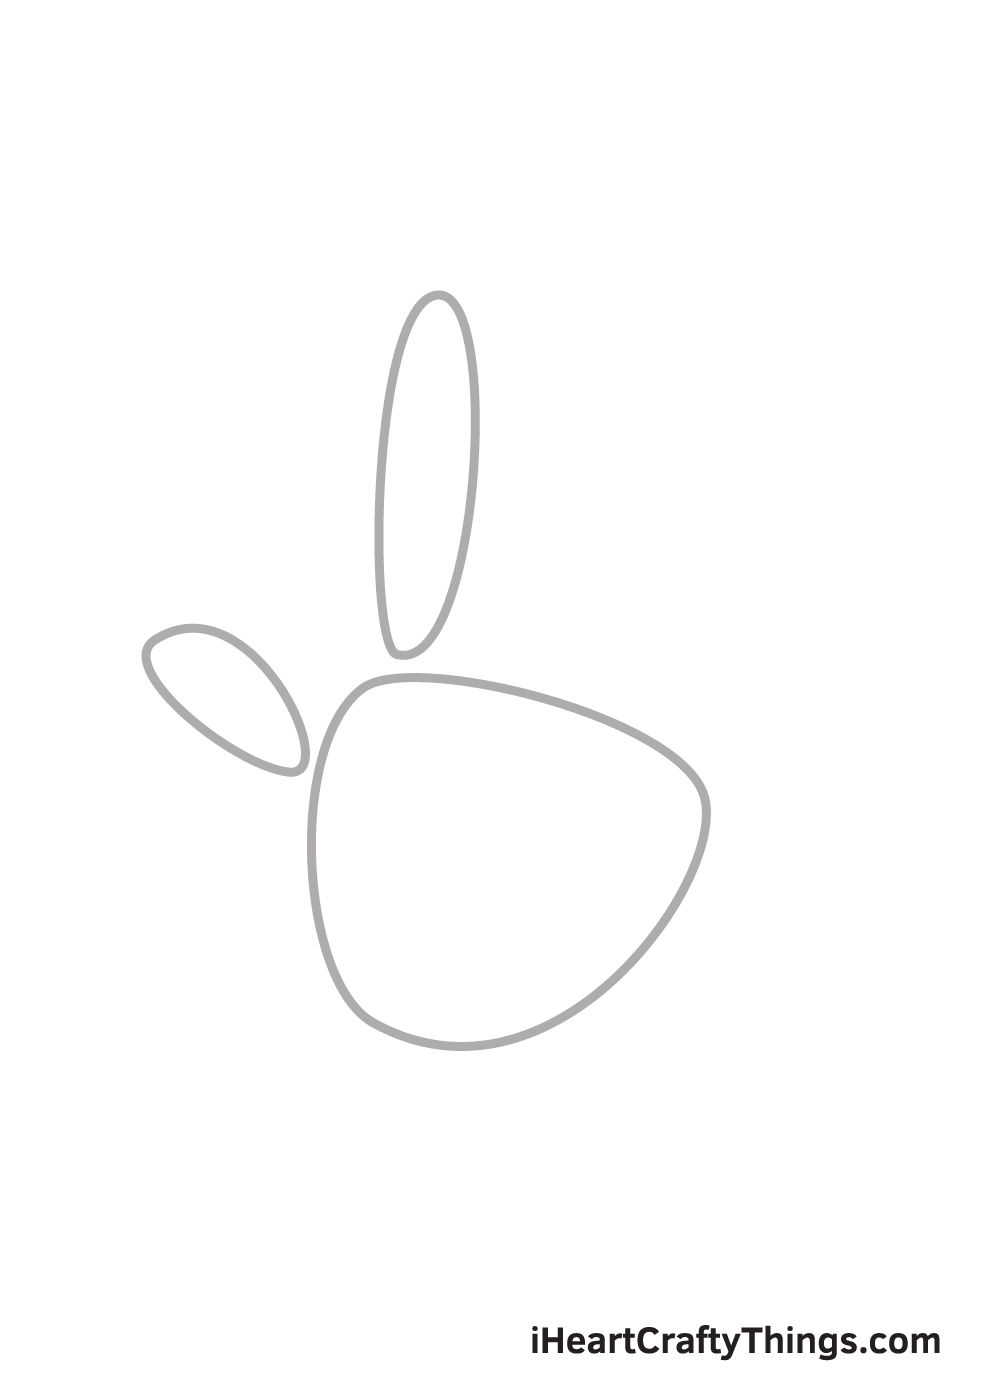
Draw a long oval shape on the leftmost tiptop of the palm. This outlines the index finger.
The length of the index finger's outline must be as long as how your manus's index finger would exist. Needless to say, y'all tin customize the length and width of every finger.
Pace iv — Side by side, Draw the Outline of the Middle Finger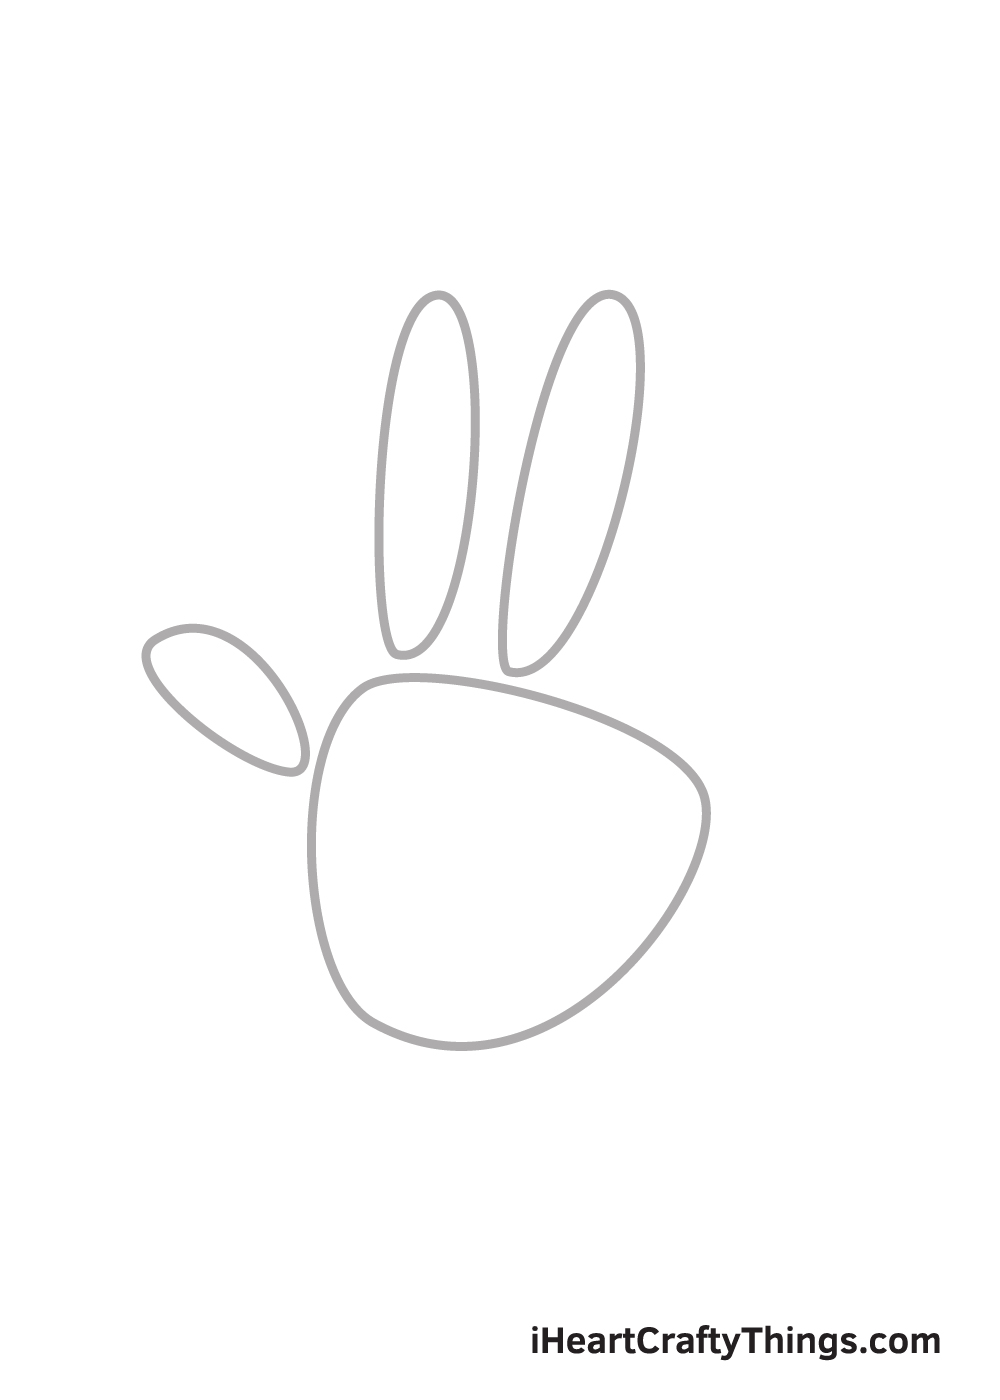
Moving on to the adjacent finger, draw another long oval shape right abreast the index finger'southward outline. The middle finger must be relatively bigger than the alphabetize finger, as how it naturally is.
Step 5 — Afterwards, Draw the Outline of the Band Finger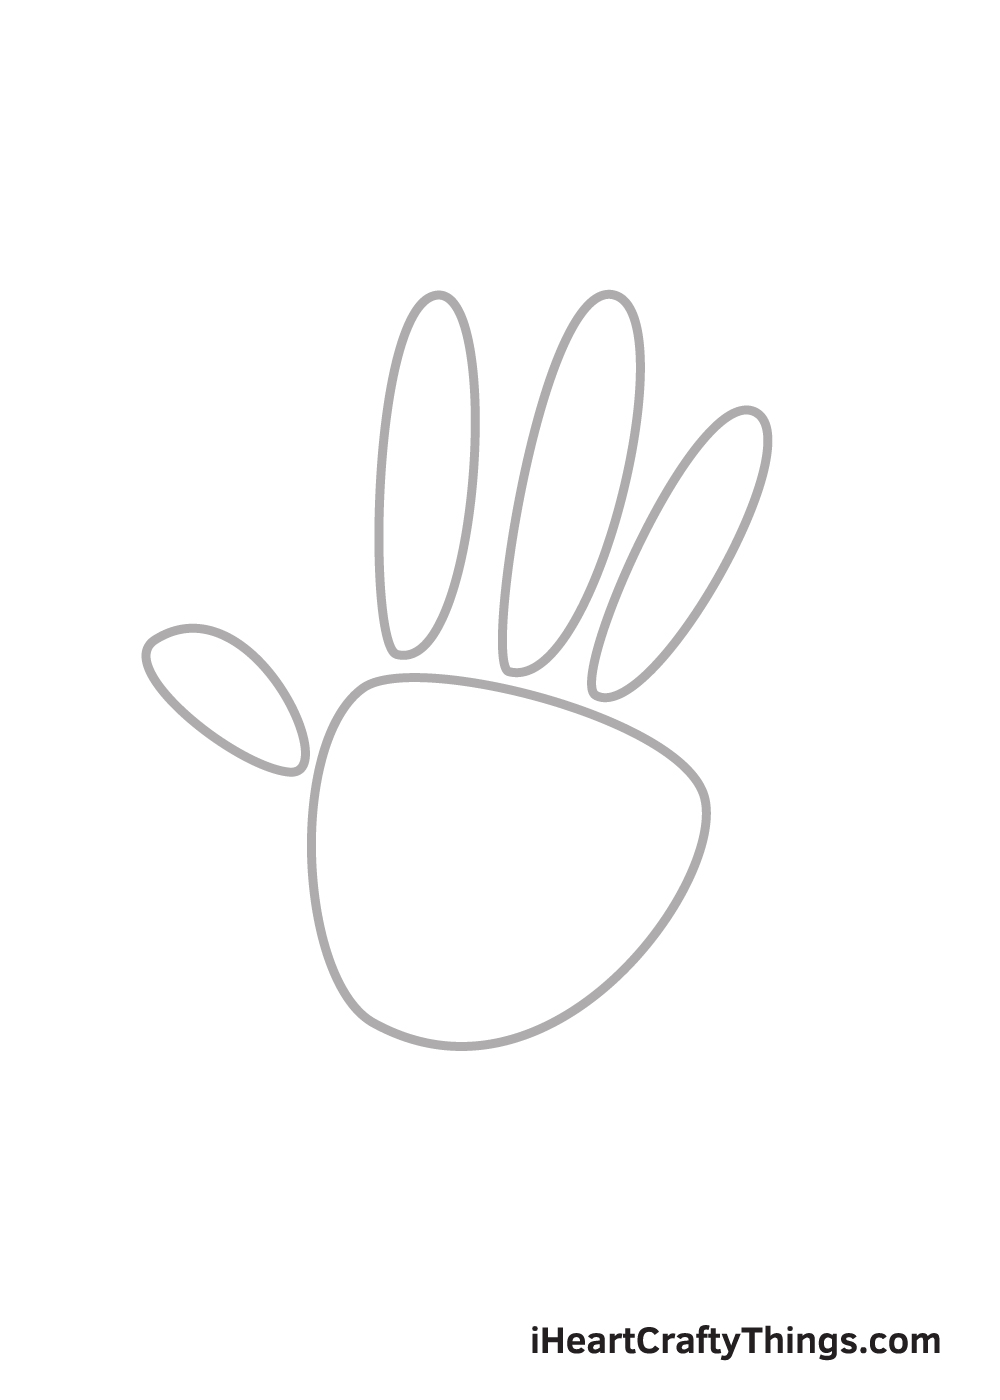
At present, we volition be working on the adjacent finger subsequently the center finger. Depict an outline of the ring finger correct beside the heart finger.
The ring finger must exist slightly smaller than both the index finger and the middle finger.
Step half-dozen — Adjacent, Draw the Outline of the Pinky Finger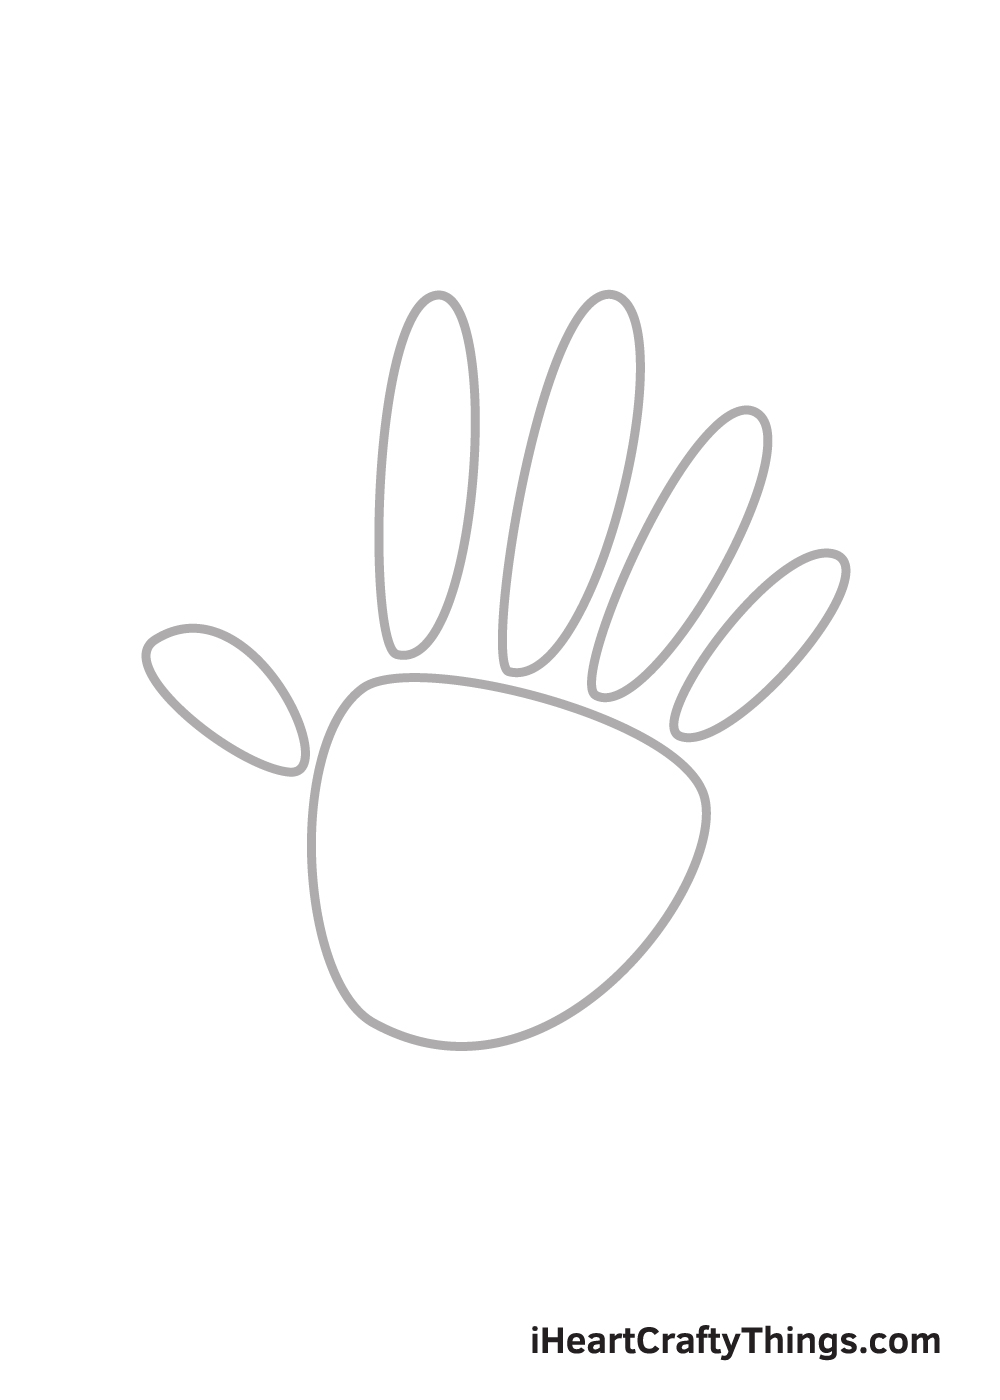
Beside the ring finger, depict an oval shape that is smaller than the ring finger merely nevertheless bigger than the thumb.
When you're in doubt, check your own hands to determine if the sizes of the fingers are accurate. By and large, the heart finger is the tallest, followed by the index or band finger, while the thumb and pinky finger are the smallest.
Footstep 7 — Now, Draw the Wrists Beneath the Hand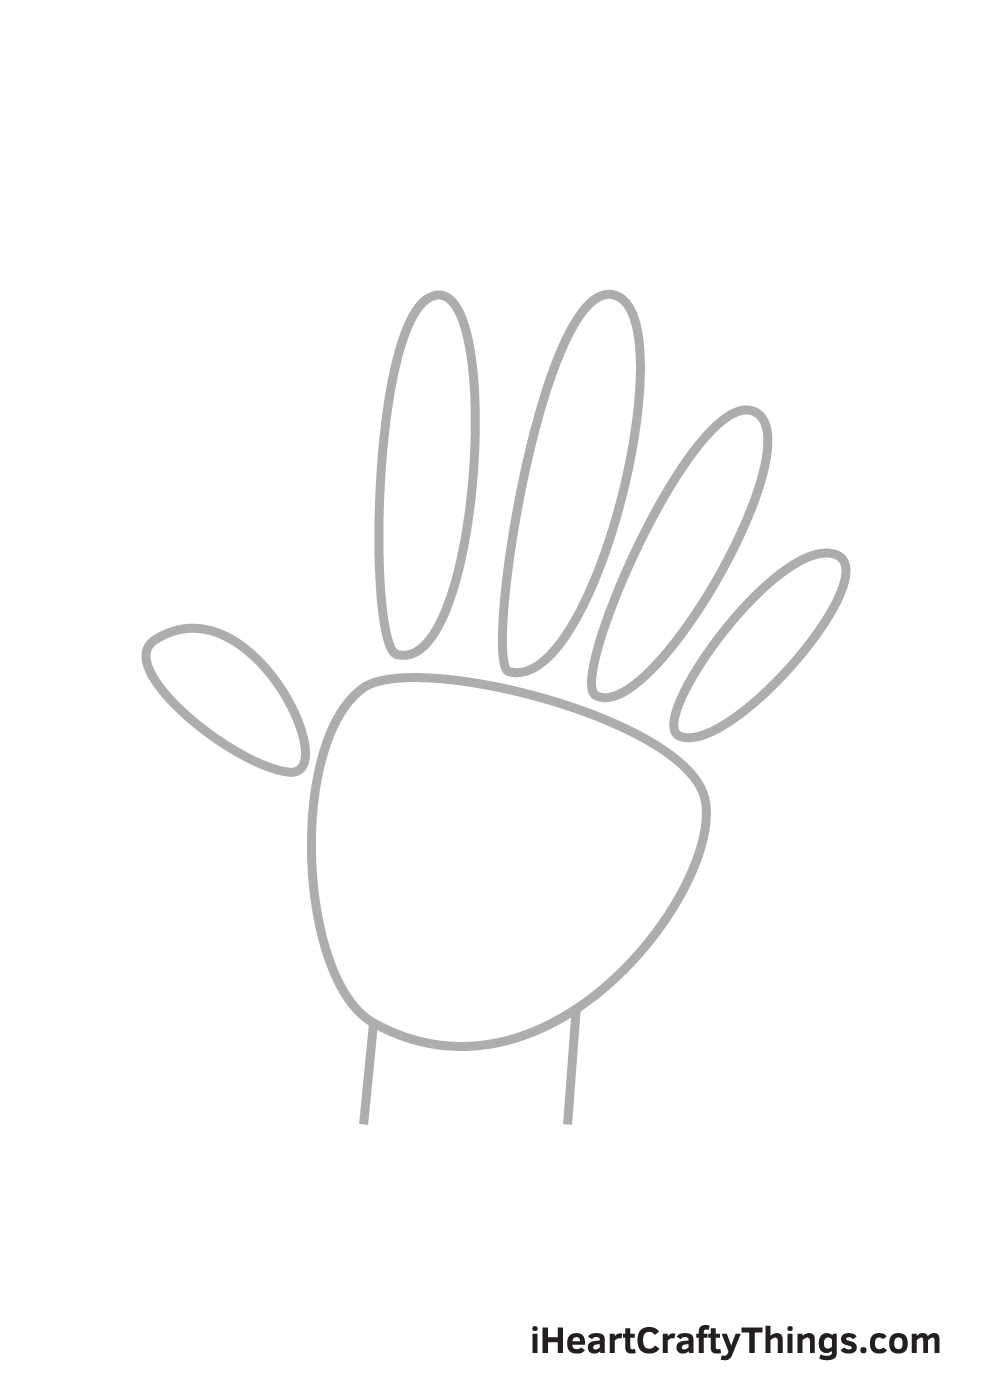
Right underneath the palm, draw ii short vertical lines at the lesser. The distance betwixt the lines should be how thick or thin you desire the wrist to exist.
Step 8 — Trace and Structure the Outline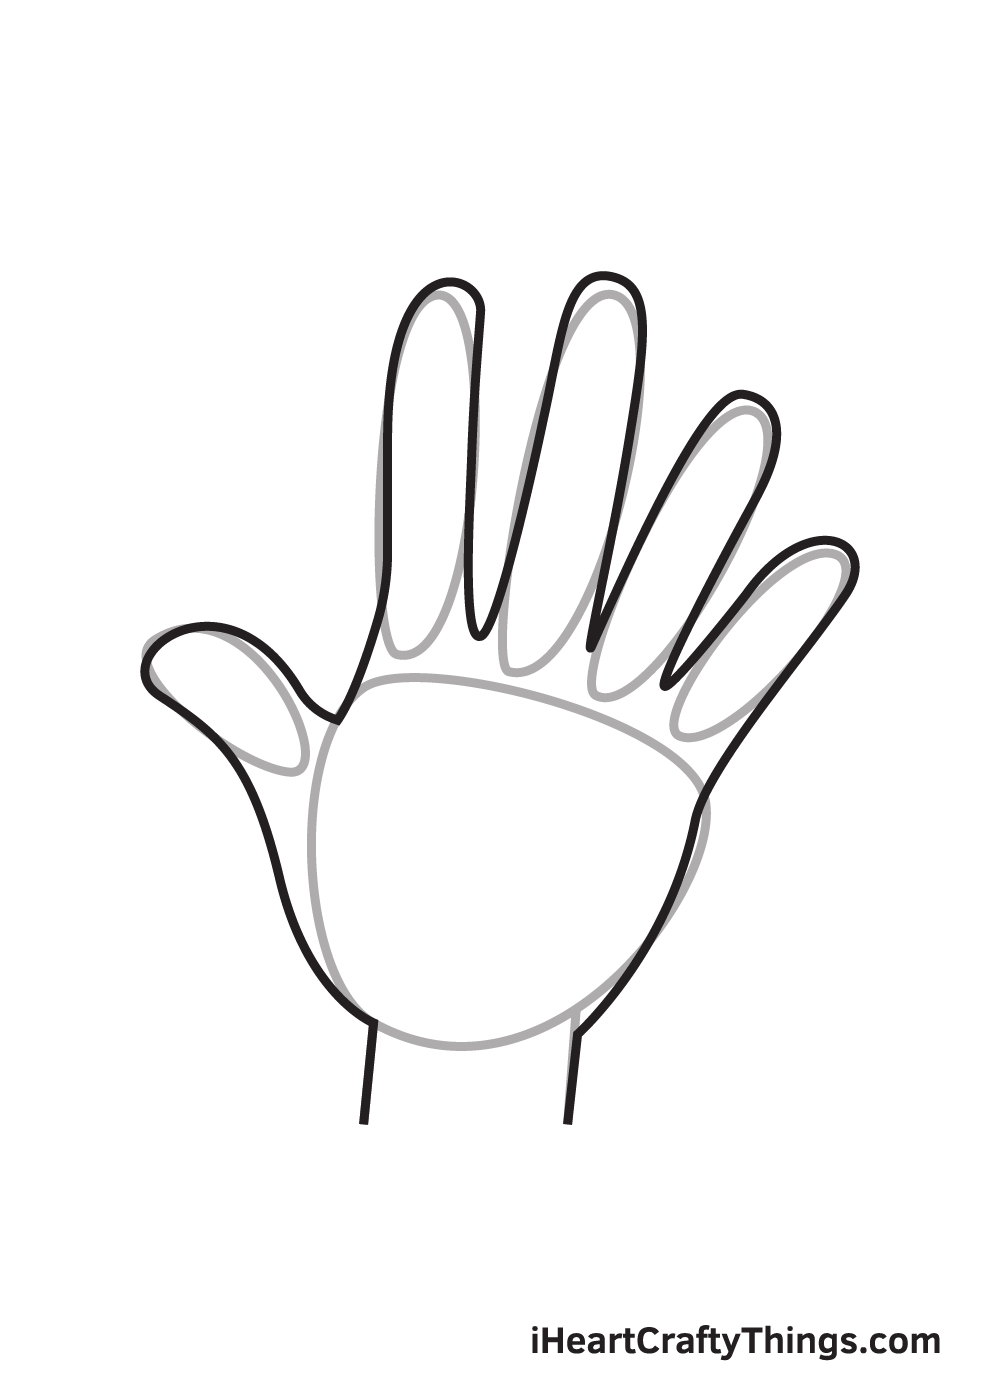
Depict over the outlines we have fatigued in the previous steps to finally create the structure of the hand. Draw curves whenever necessary, but go along your lines directly especially on the fingers. This finally forms and structures the hand.
As you lot can see in the analogy, the hand is gradually coming to life!
Pace nine — Erase the Outline Add Palm Lines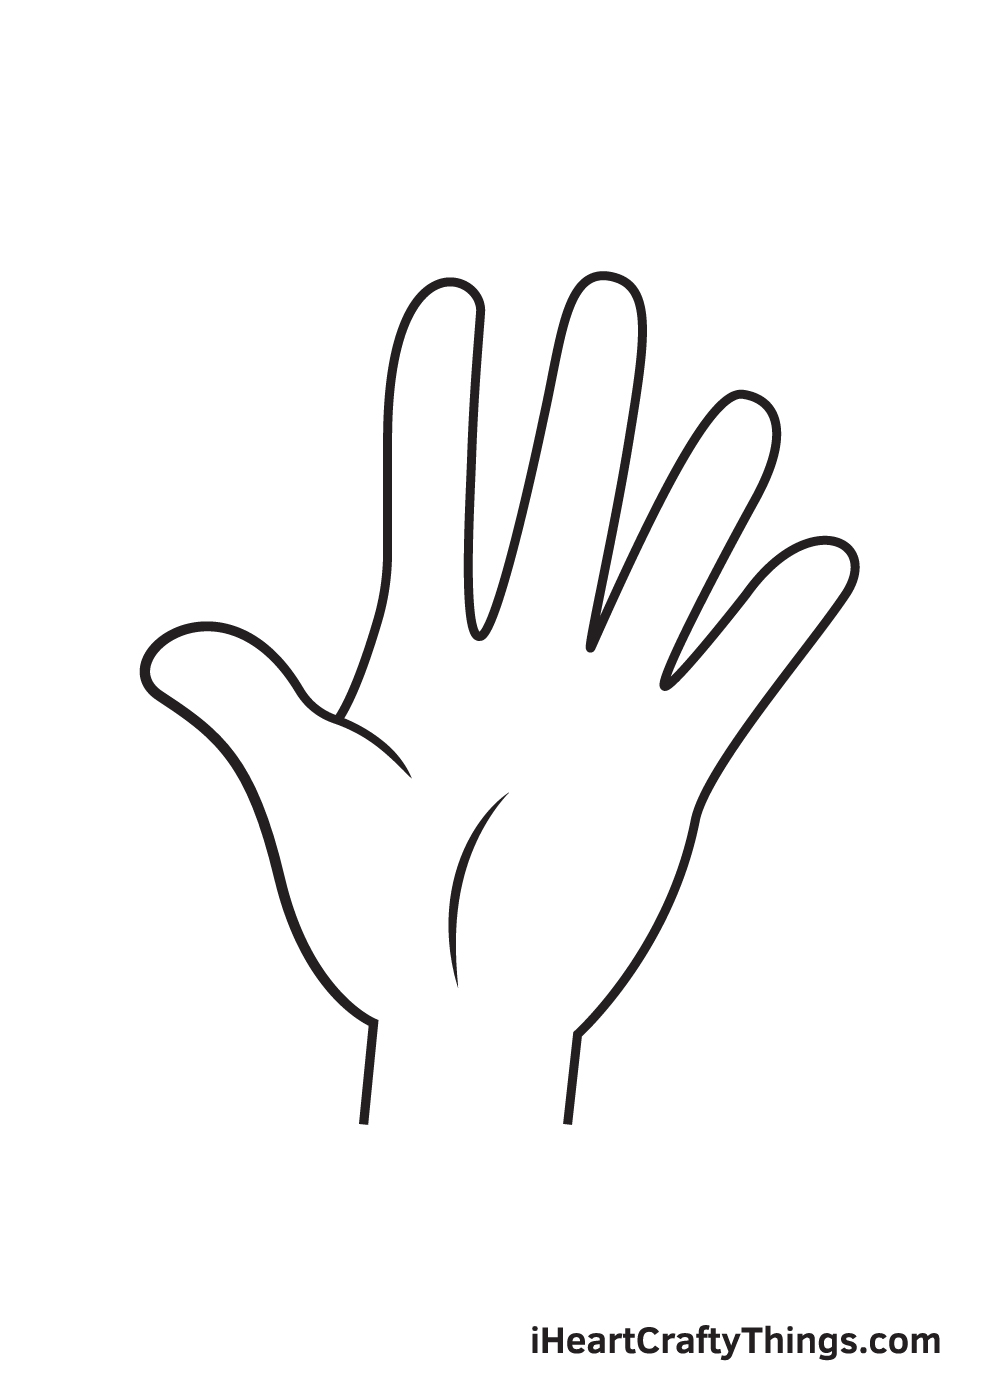
At present that you take successfully structured the class of the mitt, you no longer need the outlines we have drawn in the previous steps. And then, catch your eraser and erase all the unnecessary marks on your newspaper, leaving a neat, structured course of the hand.
Afterwards, draw a sideways curved line facing towards the pollex. This volition create an outline for the palm lines, making the mitt appear dimensional and realistic.
Here, you can see the hand is about finished! The only thing it's missing is a nuance of multiple colors to complete your artwork!
Finally, here is the most heady part—filling in the colors for your crawly drawing! This is the part where you can testify off your artistic skills and your ability to mix and friction match various colors.
To create a skin tone color, mix the colors red, yellow, brown, and white. Depending on the complexion you lot're aiming for, y'all may want to add more than of a specific color than the residue.
Feel costless to color your mitt cartoon nevertheless you similar and use any colors you prefer! And while you're at it, why not effort experimenting with different coloring materials as well?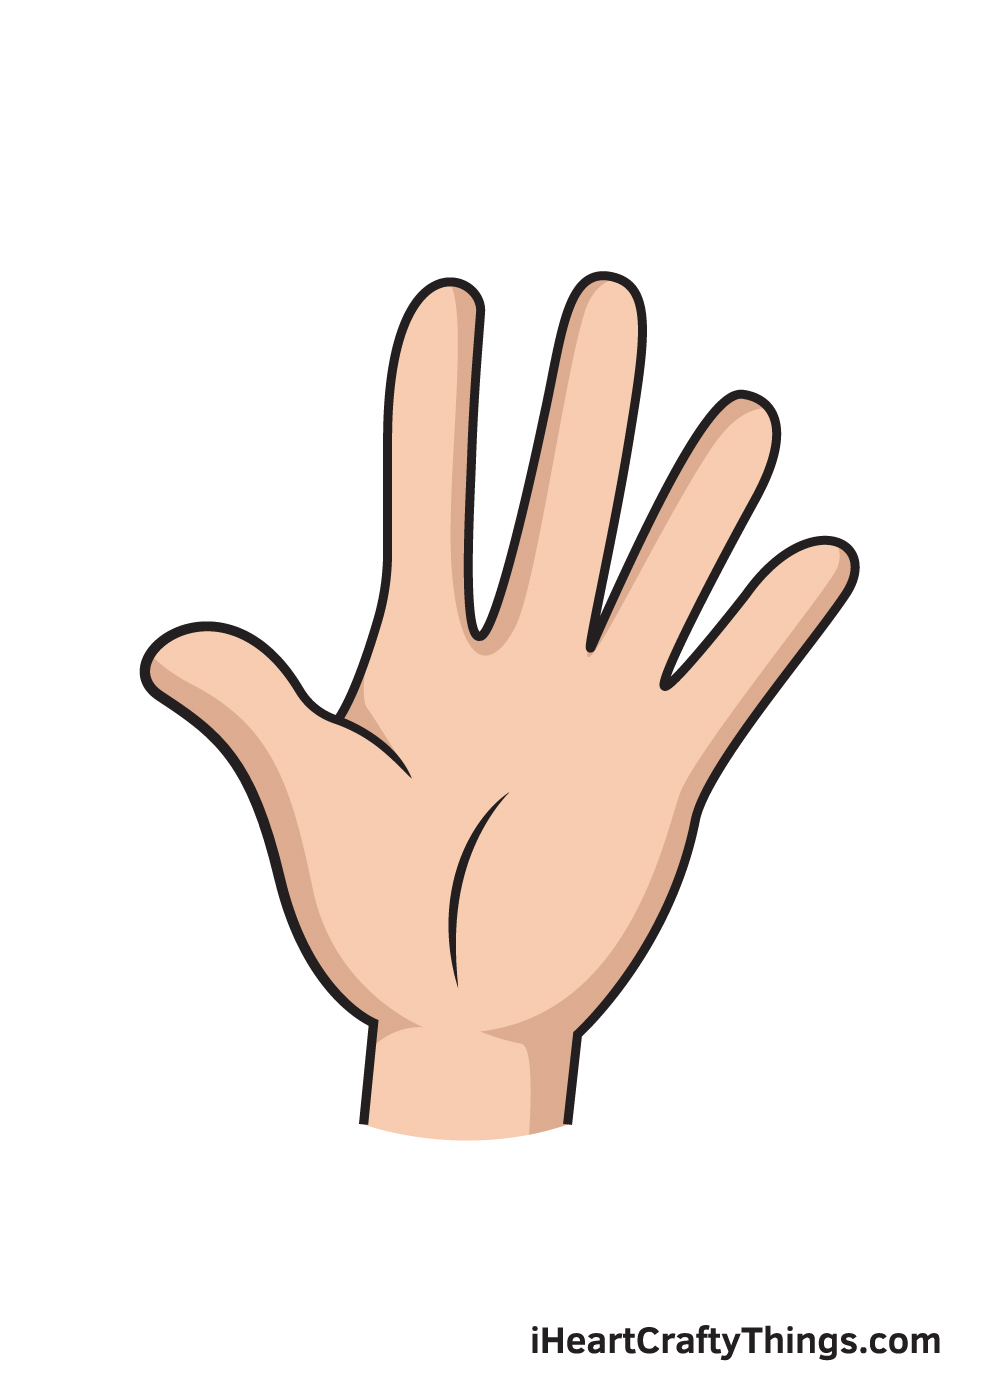
Your Paw Cartoon is Consummate!
We hope you enjoy this step-by-pace tutorial on how to describe a hand. With this guide, yous tin can surely draw and colour a hand along with its complex features and elaborate details in no time.
And the most fun office is, you can customize its concrete attributes and play with diverse colors equally much as yous like!
We are e'er updating our "How to Draw" catalog, so make sure to keep checking back on our website to take advantage of newly uploaded tutorials.
All you demand is a pen and paper and you're all set to start cartoon! We are excited to encounter what y'all volition depict side by side. We're sure it will be just as astonishing as this one!
In one case you've finished your masterpiece, we're sure you must be feeling very proud of yourself—as you should be! Completing this hand drawing is definitely fulfilling.
Make sure to prove off your work of fine art and share it on our Facebook page and on Pinterest. We're sure it looks amazing! We tin't wait to run across your colorful hand drawing!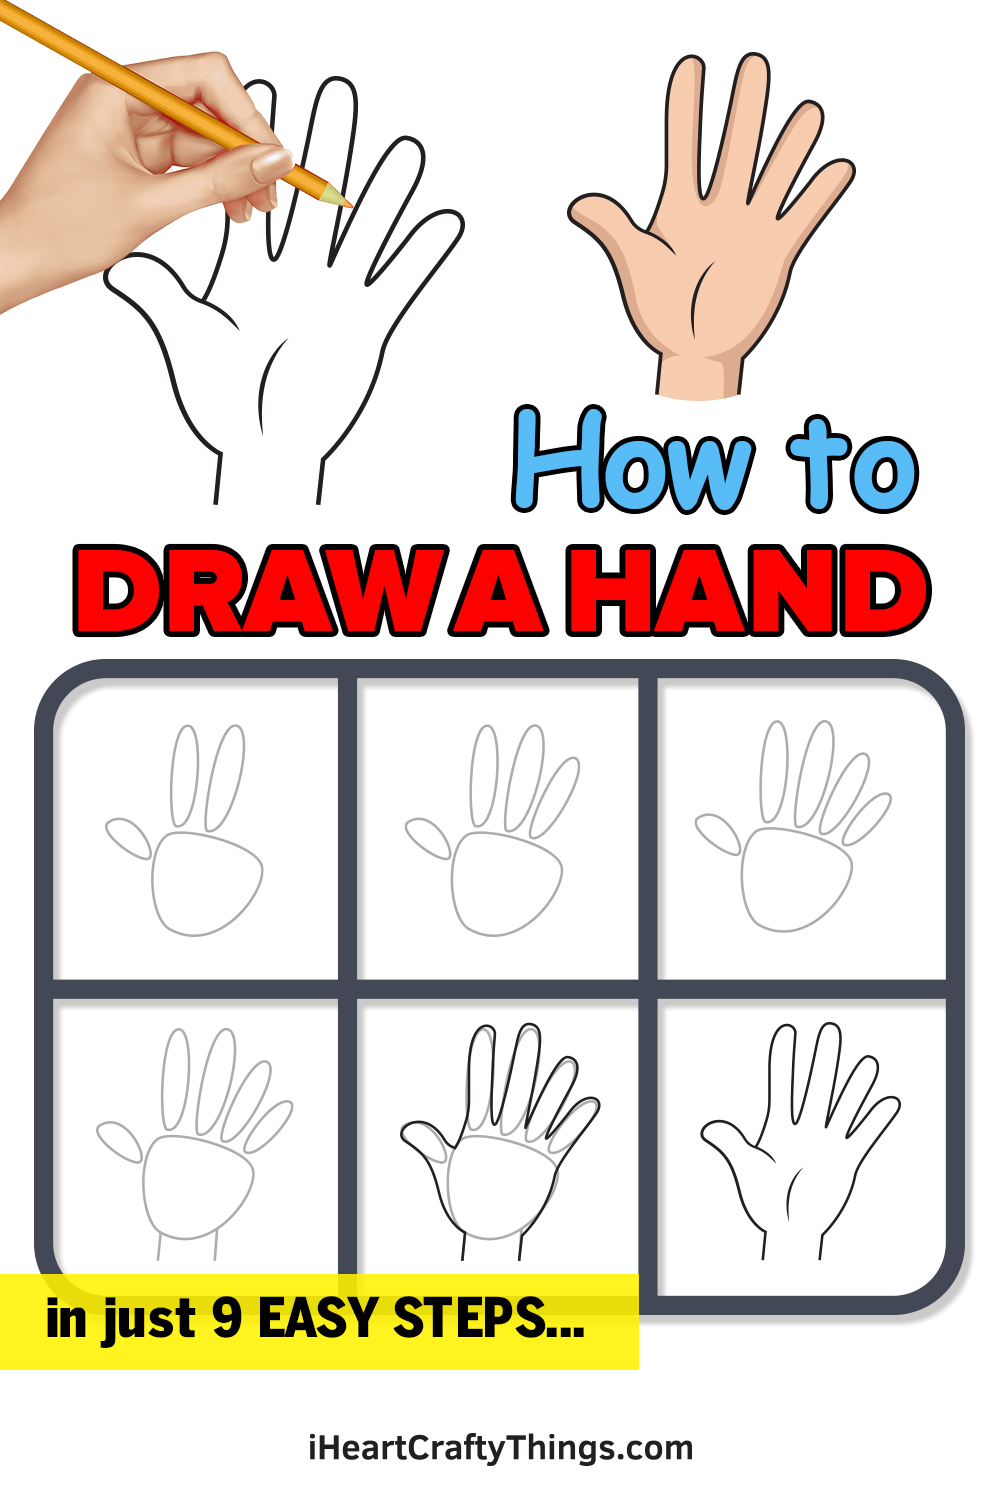

Source: https://iheartcraftythings.com/hand-drawing.html
Posted by: meachamdiesse.blogspot.com
0 Response to "How To Draw A Flat Hand Sideways"
Post a Comment